Every property contains hidden potential waiting to be unlocked. From forgotten loft spaces gathering dust to basement areas serving merely as storage, these underutilised zones represent significant opportunities for expanding your living space without the expense and complexity of building extensions. Modern conversion techniques and materials have transformed what was once considered unusable space into valuable, functional areas that enhance both property value and quality of life.
The demand for additional living space has never been higher, yet the cost of moving house continues to escalate. Property conversion offers an intelligent alternative, allowing homeowners to maximise their existing footprint through strategic transformation of overlooked areas. Whether you’re seeking additional bedrooms, home office space, or recreational areas, the key lies in understanding the technical requirements and regulatory frameworks that govern these conversions.
Converting unused spaces requires careful planning, technical expertise, and compliance with building regulations, but the rewards extend far beyond mere square footage. These projects can fundamentally transform how you experience your home, creating bespoke environments tailored to your specific needs whilst adding substantial value to your property investment.
Attic conversion strategies for maximum square footage utilisation
Loft conversions represent one of the most cost-effective methods for creating additional living space, typically adding 15-20% to property values whilst providing essential accommodation. The success of any attic conversion hinges on understanding the structural limitations and opportunities presented by your roof space, along with implementing sophisticated design strategies that maximise both headroom and floor area.
Modern conversion techniques focus on optimising every available square metre through intelligent space planning and structural modifications. The key lies in assessing the existing roof structure, determining load-bearing capacity, and implementing appropriate reinforcement strategies. Professional structural analysis forms the foundation of any successful attic conversion, ensuring that modifications comply with building regulations whilst maximising usable space.
Dormer window installation techniques for natural light optimisation
Dormer windows serve dual purposes in attic conversions, simultaneously increasing headroom and flooding spaces with natural light. The installation process requires precise structural calculations to ensure the roof can accommodate the additional opening whilst maintaining weather resistance. Modern dormer construction utilises engineered timber frames or steel structures, depending on the span requirements and existing roof configuration.
Flat roof dormers offer maximum internal space and contemporary aesthetics, whilst pitched dormers provide traditional appeal and excellent weather performance. The choice depends on planning constraints, architectural harmony, and internal space requirements.
Properly designed dormers can increase usable floor area by up to 40% whilst dramatically improving the quality of natural light penetration
Structural engineering requirements for Load-Bearing modifications
Converting loft spaces often necessitates significant structural modifications to accommodate increased floor loads and provide adequate headroom. Existing ceiling joists, typically sized for minimal loading, require reinforcement or replacement with engineered solutions capable of supporting habitable room loads of 1.5kN/m² plus additional dead loads from insulation and finishes.
Steel beam insertion may be required to create open-plan spaces or support modified roof structures. These interventions demand careful analysis of load paths and foundation capacity, ensuring that additional loads are safely transferred to the ground. Professional structural engineers employ sophisticated modelling techniques to optimise beam sizes and positioning, minimising costs whilst ensuring compliance with British Standards.
Insulation specification standards under building regulations part L
Thermal performance requirements for loft conversions have become increasingly stringent, with Building Regulations Part L demanding U-values of 0.16 W/m²K for roof elements. Achieving these standards requires comprehensive insulation strategies that address thermal bridging, air leakage, and condensation risks whilst maintaining adequate ventilation.
Modern insulation systems employ multi-layer approaches, combining rigid insulation boards with natural fibre insulation to maximise thermal performance within limited rafter depths. Continuous insulation layers prevent thermal bridging, whilst vapour control layers manage moisture movement and prevent interstitial condensation. These systems must be carefully detailed around structural elements and service penetrations to maintain performance integrity.
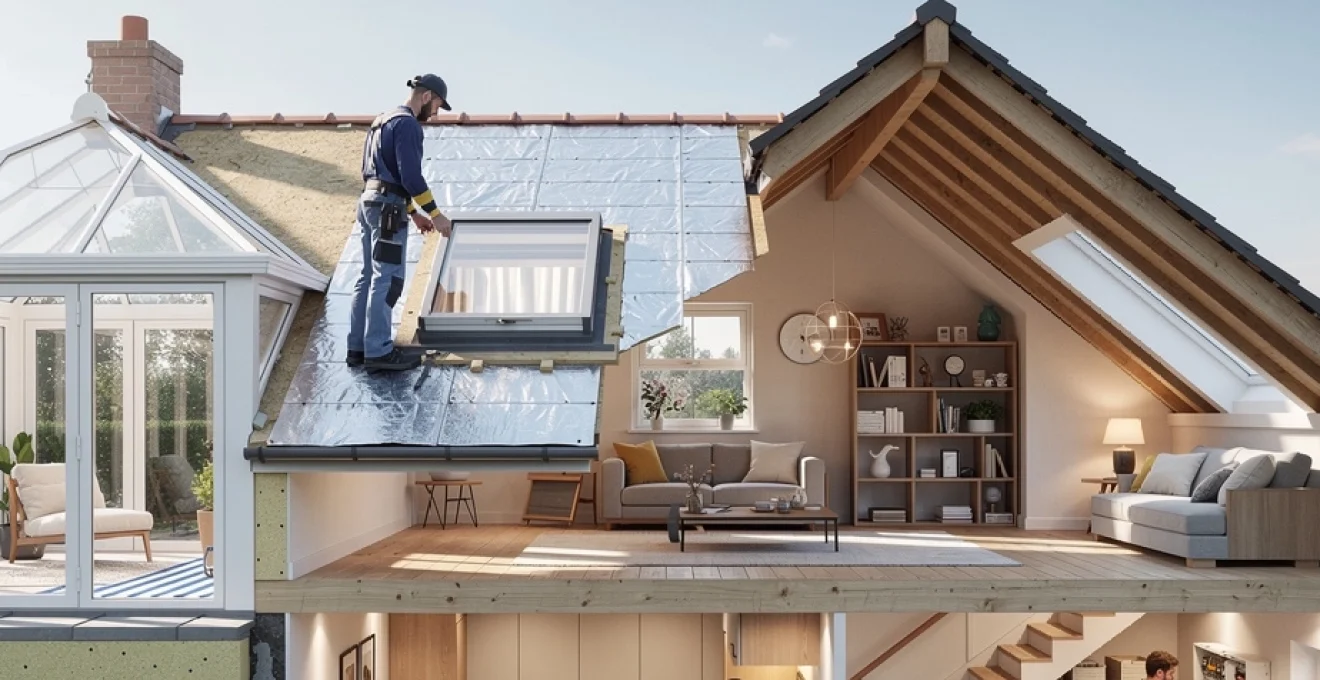
Velux roof light integration for enhanced thermal performance
Contemporary roof windows offer exceptional thermal performance and weather resistance, with triple-glazed units achieving U-values as low as 0
.8 W/m²K, meaning you can introduce generous daylight into your attic conversion without sacrificing energy efficiency. Correct installation is critical: roof lights should be fitted with insulated upstands, airtight collars, and carefully taped junctions to prevent heat loss and moisture ingress around the frame. When positioning Velux roof lights, aim to balance even light distribution with privacy, typically locating them above circulation routes or work areas rather than directly over beds. By combining high-performance glazing with external blinds or solar control coatings, you can also manage summertime overheating, turning your once-dark loft into a bright, thermally stable living space.
Basement waterproofing and damp-proofing solutions for habitable spaces
Transforming a basement from a cold, damp store into a comfortable living area hinges on effective waterproofing and moisture control. Below-ground structures are constantly exposed to lateral water pressure from surrounding soil, as well as potential rising damp from below the slab. Without a robust basement waterproofing strategy, any conversion risks mould growth, structural deterioration, and failure to meet habitable standards. Modern systems focus on managing water rather than trying to resist it entirely, combining tanking membranes, cavity drainage, and sump pumps to create a controlled, dry environment.
Before selecting a waterproofing solution, you should commission a thorough survey to identify existing defects, sources of water ingress, and the condition of the foundations. The surveyor or specialist designer will typically classify the intended use of the space under BS 8102 (discussed below), then recommend a combination of Type A (barrier), Type B (integral) and Type C (drained) protection. By integrating moisture management with insulation, ventilation, and heating, basement conversions can achieve year-round comfort comparable to above-ground rooms, even in older properties with challenging ground conditions.
Tanking membrane systems for below-ground level moisture control
Tanking systems form a continuous barrier between the basement interior and external moisture. Traditionally, this involved cementitious slurries or bituminous coatings applied directly to walls and floors, but modern approaches often favour flexible tanking membranes that can cope better with building movement. These membranes are applied to prepared substrates, lapped and sealed at joints to create a watertight envelope that resists water penetration under hydrostatic pressure.
For properties with moderate water ingress risk, a well-installed tanking membrane can be sufficient to create a dry environment suitable for living spaces. However, preparation is everything: existing plaster and loose material must be removed, cracks chased out and repaired, and junctions between walls and floors carefully detailed to avoid weak points. Think of tanking like waterproofing a swimming pool in reverse; any pinhole or poorly sealed joint becomes a route for water under pressure. Professional installation and adherence to manufacturer guidelines are therefore essential for long-term performance.
Cavity drainage installation methods for existing foundation walls
Cavity drainage systems (often called Type C systems) take a different approach by allowing water to enter behind a studded membrane, then channelling it to a safe discharge point. Plastic studded membranes are fixed to existing basement walls and floors, creating a small air gap that relieves hydrostatic pressure and directs moisture towards perimeter channels. These channels, in turn, lead to a sump chamber or gravity drain, where water is safely removed from the structure.
One of the major advantages of cavity drainage in existing buildings is that it is relatively non-invasive and tolerant of slight movement or cracking in the original structure. The membrane is then over-lined with insulated stud walls or dry lining, creating a warm internal surface ready for finishes. To function reliably, the system relies on unobstructed drainage paths and regular maintenance; installed access points allow you to inspect and clear channels if required. When combined with a well-configured sump pump, cavity drainage offers a robust, flexible solution for basements in areas with higher water tables or fluctuating ground conditions.
Sump pump configuration for sub-surface water management
The sump pump is the engine of many basement waterproofing solutions, quietly removing water collected by cavity drains or sub-slab drainage layers. A typical system comprises a sump chamber recessed into the floor slab, one or more submersible pumps, non-return valves, and discharge pipework routing water to a suitable outfall. For habitable basements, most specialists recommend twin-pump arrangements with duty and standby units, ensuring continued operation if one pump fails.
To protect your investment, it’s wise to specify alarms, battery backup systems, and regular service agreements. Consider how frustrating a power cut would be if it coincided with heavy rainfall; a battery-backed pump can prevent temporary outages from becoming serious flooding incidents. Discharge routes must also comply with local regulations, particularly if you are pumping to surface water drains or soakaways. By treating sump pump configuration as part of the overall basement design rather than an afterthought, you can create a resilient, low-maintenance moisture management system.
British standard BS 8102 compliance for basement conversion projects
BS 8102:2009 is the key reference document governing the protection of below-ground structures against water from the ground. For any serious basement conversion, designers and contractors should work explicitly to its guidance, which classifies levels of protection, risk assessment procedures, and suitable combinations of waterproofing types. The standard differentiates between basic storage areas and fully habitable rooms, with the latter requiring more robust protection and a higher tolerance for occasional maintenance.
BS 8102 also stresses the importance of appointing a waterproofing specialist at design stage, rather than attempting to retrofit solutions once problems emerge. The document encourages a “belt and braces” approach in higher-risk situations, combining, for example, a Type A barrier on the outside of walls with a Type C drained cavity system internally. For homeowners, asking whether your proposed scheme meets BS 8102 is a simple way to check if the design team is thinking long-term.
Any basement intended as living space should be designed to BS 8102 standards, with an expectation of a dry environment under normal conditions
Under-stair storage optimisation through bespoke joinery solutions
The triangular void beneath a staircase is one of the most common yet overlooked areas of dead space in a home. Rather than allowing it to become a dumping ground for shoes and clutter, bespoke joinery can transform this awkward volume into highly efficient storage or even compact functional zones. By tailoring cabinetry to the exact geometry of your stairs, you make use of every centimetre, turning an underused gap into a practical asset.
Popular solutions include pull-out drawers for shoes, integrated coat cupboards, or open shelving for books and display items. For properties short on workspace, under-stair areas can even accommodate a small home office with a built-in desk, concealed power outlets, and task lighting. When designed well, these interventions feel as if they have always been part of the house, seamlessly integrating with existing skirting lines, balustrades, and flooring, while drastically improving day-to-day organisation.
Garage conversion methodologies for multi-purpose living areas
Garages offer some of the most versatile opportunities for turning unused spaces into functional areas, especially as many households no longer use them for car storage. Converting a garage into a home office, gym, playroom, or annex can add substantial usable floor area at a fraction of the cost of a full extension. The challenge lies in upgrading what is essentially a semi-finished shell into a thermally efficient, comfortable room that meets current building regulations.
Typical garage conversion strategies involve insulating floors, walls, and roofs, replacing draughty doors, upgrading electrical installations, and addressing planning considerations under permitted development rights. Because garages often sit at ground level adjacent to main living spaces, thoughtful design can create a seamless transition, avoiding the “bolted on” feel that some conversions suffer from. With careful planning, you can create a genuinely multi-purpose living area that adapts to changing needs over time.
Concrete floor insulation techniques using rigid foam boards
Most garages have uninsulated concrete slabs that feel cold underfoot and act as a thermal bridge to the outside. To create a comfortable living area, you will usually need to install a continuous layer of rigid foam insulation above the existing slab. Popular choices include PIR or XPS boards, selected for their high thermal performance and compressive strength, which can support finished floor coverings without excessive deflection.
The typical build-up involves laying a damp-proof membrane over the existing concrete, followed by rigid insulation boards with tightly butted joints, then a structural deck such as tongue-and-groove chipboard or a thin screed. Door thresholds and existing room levels must be carefully considered to avoid awkward steps or trip hazards; sometimes, shaving a small amount off the slab or using thinner, higher-performance insulation can help maintain level access. By treating the insulated floor as a continuous thermal envelope, you avoid cold spots and improve the overall energy efficiency of your new living space.
Sectional door replacement with thermal bridging prevention
The original garage door opening is often the weakest link in terms of heat loss and air leakage. Replacing a lightweight metal up-and-over door with an insulated stud wall and high-performance window or door set is usually essential for a successful conversion. This new frontage should incorporate continuous insulation across the former opening, with careful attention to junctions where the wall meets existing masonry to avoid thermal bridges.
Think of thermal bridging as heat “leaking” through solid elements like steel lintels or poorly insulated reveals, much like water finding gaps in a dam. To combat this, designers use insulated cavity closers, thermal break lintels, and insulated window jambs, all taped and sealed to the air barrier layer. In some cases, retaining a well-insulated sectional garage door can suit a hybrid use where part of the space remains for storage, but even then, perimeter seals and insulation upgrades are crucial. The end result should look cohesive from the street while delivering the airtightness and thermal comfort expected of a modern room.
Electrical circuit upgrading from 17th edition wiring regulations
Many older garages were wired only for a single fluorescent strip light and a couple of sockets, often on ageing circuits that pre-date current safety standards. When creating a habitable room, you’ll almost certainly need to upgrade the electrical installation to align with the latest wiring regulations (now the 18th Edition, which built upon the 17th). This usually involves installing new ring mains or radial circuits for sockets, dedicated lighting circuits, and RCD/RCBO protection at the consumer unit.
A qualified electrician will assess the existing supply capacity, earthing arrangements, and bonding requirements, then design a scheme that supports your intended use – whether that is multiple computer workstations, exercise equipment, or audiovisual systems. It’s also the perfect opportunity to integrate modern conveniences such as USB sockets, data cabling, and smart lighting controls. While these upgrades add to the upfront cost, they significantly improve safety, flexibility, and resale appeal.
Planning permission exemptions under permitted development rights
One of the attractions of garage conversions is that many fall under permitted development rights, meaning full planning permission is not always required. In England, internal alterations and changes of use that do not materially alter the external appearance of the building can often proceed under these rights, provided the resulting space remains ancillary to the main dwelling. However, there are important caveats, especially in conservation areas, on listed buildings, or where previous planning conditions require the garage to remain as parking.
Before starting work, it’s wise to check with your local planning authority and consider obtaining a Lawful Development Certificate as formal confirmation that your project is permitted. Remember that building regulations approval is still required for structural changes, insulation, fire safety, and electrics, even if planning permission is not. By clarifying your position early, you avoid costly delays or enforcement issues later in the project.
Alcove and niche transformation using space-saving furniture systems
Alcoves and niches might appear too small to be useful, but with the right furniture systems they can become some of the hardest-working areas in your home. Whether flanking a chimney breast, tucked into a hallway, or created by awkward structural projections, these recesses are ideal candidates for built-in storage and compact functional zones. By using made-to-measure shelving, slimline desks, or fold-away seating, you can unlock valuable square footage without encroaching on circulation routes.
Space-saving furniture such as wall-mounted drop-down desks, sliding door cabinets, and integrated media units helps maintain a clean, uncluttered aesthetic while providing everyday usability. For example, a shallow alcove in a living room can house a full media wall with hidden cable management, while a bedroom niche can become a dressing station with concealed lighting and mirror storage. The key is to think vertically as well as horizontally, exploiting full ceiling height and using consistent finishes so that new elements feel integrated rather than “stuck on”.
Conservatory thermal upgrade specifications for year-round functionality
Many UK homes feature conservatories that are stiflingly hot in summer and uncomfortably cold in winter, limiting their use to a few mild months each year. Thermal upgrades can convert these seasonal spaces into true year-round rooms, providing valuable extra living area without the need for a full extension. The focus is on improving glazing performance, upgrading floors and roofs, and managing solar gain so that the conservatory behaves more like a modern garden room than a lightweight sun-porch.
Key interventions include retrofitting high-performance double or triple glazing, installing underfloor heating, and upgrading roof insulation using advanced materials such as multifoil systems. When designed correctly and carried out under building regulations guidance, these improvements can bring the conservatory closer to the thermal standards of the main house. This not only enhances comfort but can also improve your property’s overall energy efficiency rating, making better use of existing footprint rather than building new space.
Double glazing retrofit solutions for victorian and edwardian extensions
Older conservatories and glazed extensions, particularly those added to Victorian and Edwardian properties, often feature single glazing or early-generation double-glazed units with poor thermal performance. Retrofitting modern double or even slimline heritage units can dramatically improve comfort while preserving period character. Today’s high-performance units can achieve centre-pane U-values as low as 1.0 W/m²K or better, compared with 5.0 W/m²K for single glazing.
In conservation areas or on listed buildings, you may be constrained by planning and heritage requirements, but specialist suppliers offer discreet framing profiles and putty-line details that respect original aesthetics. It’s essential to consider ventilation and solar control at the same time; low-e coatings, warm-edge spacers, and solar control glass help reduce heat loss in winter and overheating in summer. By treating glazing upgrades as part of a holistic conservatory renovation, you ensure the space becomes truly usable rather than just cosmetically improved.
Underfloor heating installation methods in tiled conservatory floors
Underfloor heating is particularly well-suited to conservatories, where large areas of glazing make wall space for radiators limited and uneven. Electric or water-based systems can be installed beneath new tiled floors, providing gentle, evenly distributed warmth that counteracts cold downdrafts from glass surfaces. For retrofit projects, low-profile systems are available that minimise floor build-up height, reducing the impact on thresholds to adjoining rooms and external doors.
The typical installation involves a layer of insulation over the existing slab, followed by the heating system and a suitable screed or tile backer, then the final floor finish. Good control is vital: linking the underfloor heating to programmable thermostats and, ideally, external temperature sensors ensures the space responds efficiently to changing solar gains. When combined with improved glazing and roof insulation, underfloor heating can turn a once-chilly conservatory into a comfortable living or dining area you actually want to use in the depths of winter.
Roof insulation techniques using multifoil reflective materials
Conservatory roofs are often the primary source of heat loss in winter and overheating in summer, particularly where polycarbonate sheets were originally installed. Replacing or over-cladding these roofs with insulated systems that incorporate multifoil reflective materials can significantly enhance thermal performance. Multifoil insulation works by combining multiple layers of reflective foil and wadding to reduce radiant heat transfer, much like a high-tech survival blanket wrapped around your roof structure.
In practice, multifoil products are installed beneath new solid or tiled conservatory roofs, or as part of insulated pelmet systems, creating a warm, airtight envelope above head height. To perform as claimed, they must be fitted with correct air gaps and sealed joints, often in conjunction with rigid insulation boards to meet required U-values. When specified and installed properly, these upgrades not only stabilise internal temperatures but also reduce rain noise and improve the overall feel of the room, completing the journey from occasional sunroom to fully functional living space.