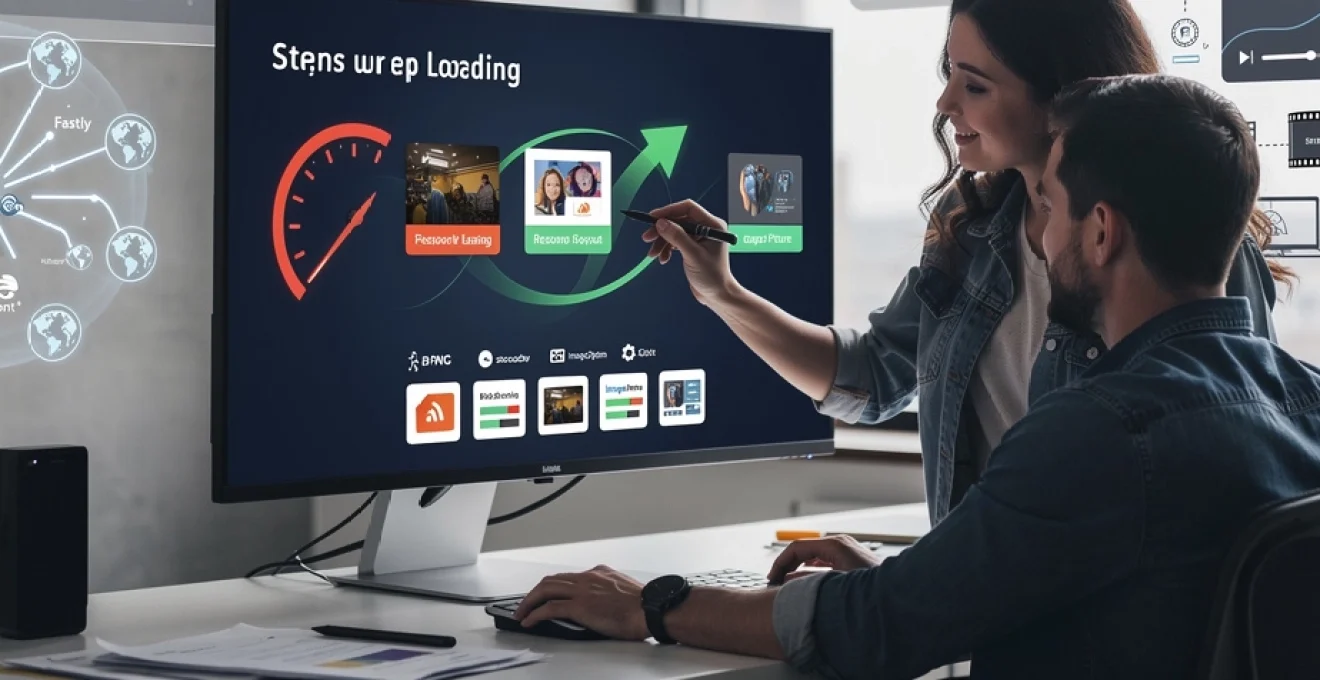
Website performance has become a critical differentiator in the digital landscape, where visitors expect near-instantaneous page loads and seamless browsing experiences. Images and media assets, whilst essential for creating engaging and visually compelling content, often represent the largest performance bottleneck on modern websites. Research indicates that images account for approximately 50-70% of the total page weight on average websites, making their optimisation paramount for delivering exceptional user experiences. The consequences of sluggish loading times extend beyond user frustration—search engines like Google incorporate page speed as a ranking factor, directly impacting your site’s visibility and organic traffic potential. By implementing comprehensive image and media optimisation strategies, you can dramatically reduce loading times, improve engagement metrics, and gain a competitive advantage in your digital ecosystem.
The evolution of image formats, compression algorithms, and delivery mechanisms has provided web developers with an extensive toolkit for enhancing performance. However, navigating this complex landscape requires understanding the technical nuances of various formats, implementing responsive image strategies, leveraging modern browser APIs, and selecting appropriate content delivery infrastructure. The challenge lies not merely in reducing file sizes, but in maintaining visual quality whilst accommodating diverse devices, connection speeds, and browser capabilities that characterise today’s heterogeneous web environment.
Understanding image file formats: WebP, AVIF, and progressive JPEG compression
Selecting the optimal image format represents the foundational decision in any media optimisation strategy. Traditional formats like JPEG and PNG have served the web faithfully for decades, but next-generation formats now offer substantially superior compression efficiency. Understanding the strengths and limitations of each format enables you to make informed decisions that balance file size, visual quality, and browser compatibility. The format you choose can mean the difference between a 100KB image and a 30KB image with virtually identical visual fidelity—a reduction that compounds significantly across hundreds of images on a typical website.
Next-generation WebP format: lossless and lossy compression techniques
WebP, developed by Google, has emerged as a versatile format offering both lossless and lossy compression capabilities. In lossy mode, WebP typically achieves 25-35% smaller file sizes compared to equivalent JPEG images whilst maintaining comparable visual quality. The format employs predictive coding to encode pixel values based on neighbouring pixels, combined with sophisticated block-based transformations that efficiently represent image data. For images requiring transparency, WebP supports an alpha channel whilst maintaining smaller file sizes than PNG equivalents—often 3x smaller for complex transparent graphics.
The lossless WebP compression mode proves particularly valuable for graphics, screenshots, and images where perfect pixel accuracy matters. By employing techniques like palette reduction, spatial prediction, and entropy coding, lossless WebP typically produces files 26% smaller than equivalent PNG images. Browser support for WebP has reached critical mass, with approximately 95% of global users now on browsers that natively support the format, making it a pragmatic choice for most web applications. Implementation requires providing fallback formats for legacy browsers, but the performance benefits justify this additional complexity.
AVIF image codec: AV1-Based compression for superior file size reduction
AVIF represents the cutting edge of image compression technology, derived from the AV1 video codec and offering extraordinary compression efficiency. Comparative testing demonstrates that AVIF can achieve 50% smaller file sizes than JPEG and approximately 20% smaller than WebP for equivalent perceptual quality. This remarkable efficiency stems from advanced compression techniques including content-dependent transform selection, in-loop filtering, and sophisticated prediction modes originally developed for video compression. The format excels particularly with photographic content containing gradients, textures, and complex colour transitions.
Despite its impressive compression capabilities, AVIF adoption requires careful consideration. Encoding AVIF images demands significantly more computational resources than WebP or JPEG—often 10-20 times longer processing time. Browser support, whilst expanding rapidly, currently stands at approximately 70% of users, necessitating robust fallback strategies. For high-traffic websites where bandwidth costs represent significant expenses, the encoding investment may prove worthwhile. However, smaller sites might find WebP offers a more balanced compromise between compression efficiency and practical implementation considerations.
Progressive JPEG rendering: baseline versus optimised encoding methods
Progressive JPEG encoding offers a clever approach to perceived performance by rendering images in multiple passes, displaying a low-quality preview that progress
esively refines with each subsequent pass. In contrast, baseline JPEGs load from top to bottom in a single pass, which can create the impression of a stalled or partially loaded image on slower connections. Progressive encoding improves perceived performance because users see a recognisable version of the image almost immediately, even if the full-quality data is still downloading in the background. For high-traffic sites, this small psychological advantage can significantly reduce bounce rates and make content feel more responsive, particularly on mobile networks.
However, progressive JPEGs are not a silver bullet. File sizes are often similar to or marginally larger than baseline JPEGs, so you are primarily optimising for perception rather than raw bandwidth. Some older tools, CDNs, and email clients may not fully support progressive decoding, which can lead to compatibility quirks. When optimising images for faster loading times, you should test progressive JPEGs against baselines using tools like WebPageTest or Lighthouse to see how they affect both objective metrics and visual loading behaviour on your own site.
SVG vector graphics: scalable format for icons and illustrations
Scalable Vector Graphics (SVG) provide an ideal solution for icons, logos, and simple illustrations because they are resolution-independent and often extremely small in file size. Unlike raster formats such as JPEG and WebP, SVGs store shapes, paths, and colours as mathematical instructions, which means they can scale to any resolution without becoming blurry or pixelated. This property makes SVG perfect for responsive designs and high-density displays where crisp visuals are essential. For UI elements that appear across many pages, optimised SVG assets can dramatically improve cumulative layout stability and visual consistency.
From a performance standpoint, SVGs can be minified and even inlined directly into HTML to reduce HTTP requests, though this approach should be used judiciously to avoid bloating page markup. You can further optimise SVGs by removing unnecessary metadata, comments, and editor-specific tags using tools like SVGO. Because SVG files are text-based, they compress very well over gzip or Brotli, contributing to faster transfer times. Security is an important consideration: embedded scripts and external resources in SVGs can pose risks, so we recommend sanitising SVGs and limiting upload capabilities to trusted users when building a secure, fast-loading site.
Implementing responsive images with srcset and picture elements
Responsive images ensure that users only download the most appropriate asset for their device, viewport, and pixel density, which is vital when optimising images and media for faster loading times. Without responsive techniques, a mobile user on a 3G connection might be forced to download the same 2000px-wide hero image intended for desktop screens, wasting bandwidth and slowing the experience. Modern HTML attributes such as srcset, sizes, and the <picture> element allow the browser to make intelligent decisions about which image file to request. By combining these techniques with next-generation formats and a thoughtful art direction strategy, you can significantly improve performance for every segment of your audience.
Implementing responsive images may seem intimidating at first, but it follows a predictable pattern once you understand the underlying logic. You generate multiple image variants at different resolutions or aspect ratios, then describe those options to the browser through descriptive attributes. The browser evaluates these options based on the current viewport, device pixel ratio, and layout rules, then selects the smallest image that meets the display requirements. This approach avoids over-serving large files, which is one of the most effective ways to reduce page weight on content-heavy sites and ecommerce catalogues.
Srcset attribute syntax: pixel density descriptors and width descriptors
The srcset attribute provides a list of image candidates along with hints about when each one should be used. There are two primary types of descriptors: pixel density descriptors (such as 1x, 2x) and width descriptors (such as 480w, 1024w). Pixel density descriptors are well-suited to simple use cases where the image always appears at the same CSS size, but you want sharper variants for high-DPI screens. Width descriptors are more flexible and are now considered best practice because they allow the browser to factor in both layout and device capabilities when choosing the most efficient resource.
For example, you might specify srcset="image-480.jpg 480w, image-960.jpg 960w, image-1440.jpg 1440w" alongside a sizes attribute that describes how large the image appears in different viewport ranges. The browser uses this information to estimate the ideal intrinsic width to request, avoiding both under-sharp images and unnecessarily large downloads. When implementing srcset, consistency in file naming and automated generation through your build pipeline or CMS plugins will save substantial time. Have you ever tried manually generating ten image variants per article? Automation quickly becomes essential for maintaining velocity without sacrificing performance.
Picture element strategy: art direction and format fallbacks
While img with srcset handles many cases, the <picture> element becomes indispensable when you need art direction or advanced format fallbacks. Art direction refers to serving entirely different crops or compositions depending on the viewport—for example, a wide panoramic banner on desktop versus a tightly focused portrait crop on mobile. Within a <picture> tag, you can declare multiple <source> elements with media queries and different srcset values, allowing the browser to choose the most appropriate version based on CSS-like rules. This pattern helps ensure that imagery remains both visually effective and performant across the full range of devices.
<picture> also enables graceful degradation when you adopt formats like AVIF and WebP. By listing AVIF and WebP <source> elements before a fallback JPEG <img>, you allow capable browsers to reap the bandwidth benefits while older browsers still receive a compatible image. This structure is similar to offering multiple languages in a conversation: the browser picks the first “language” it understands. When optimising images and media for faster loading times, this strategy strikes a balance between innovation and reliability, ensuring that no user is left with broken or missing visuals.
Sizes attribute configuration: viewport-based image selection
The sizes attribute works hand-in-hand with srcset width descriptors to inform the browser how large an image will actually appear in different viewport scenarios. It contains a list of media conditions followed by a length value, such as (max-width: 600px) 100vw, (max-width: 1200px) 50vw, 33vw. In plain language, this tells the browser that on small screens, the image spans the full viewport width; on medium screens, it occupies half; and on larger screens, roughly a third. Equipped with this information, the browser can make a much more accurate selection from the provided srcset candidates.
Configuring sizes correctly is crucial for preventing both under- and over-fetching of image resources. If you underestimate the displayed size, the browser may choose a too-small file, resulting in a blurry or pixelated image. Overestimating leads to larger downloads than necessary, which undermines your efforts to improve performance and reduce data usage. When in doubt, inspect the rendered layout using browser dev tools and note the actual CSS pixel width of images at various breakpoints. Iterating on sizes values based on real-world layouts is one of the most effective ways to fine-tune responsive images for complex designs.
Cloudinary and ImageKit integration: automated responsive image delivery
For teams managing large media libraries, services like Cloudinary and ImageKit can automate much of the responsive image workflow. These platforms act as specialised image CDNs, generating multiple variants on-the-fly based on URL parameters, such as width, format, and quality. Instead of manually exporting ten versions of each hero image, you define transformation rules—such as w_800,q_auto,f_webp—and let the service deliver optimised variants tailored to each request. This approach not only reduces engineering overhead but also keeps your optimisation strategy consistent across the entire site.
Cloudinary and ImageKit also integrate with popular CMSs and frameworks, providing responsive image components and plugins that generate srcset and sizes attributes automatically. Some configurations can even perform automatic format negotiation, serving AVIF or WebP when supported and falling back to JPEG when necessary, without any extra markup. For organisations looking to optimise images and media for faster loading times at scale, these platforms offer analytics dashboards that highlight heavy assets, transformation usage, and cache hit ratios. By combining automation with performance insights, you can continually refine your strategy and respond quickly to emerging device trends and network conditions.
Lazy loading techniques: native browser APIs and intersection observer
Lazy loading delays the download of off-screen images and media until the user is likely to see them, which can dramatically reduce initial page load times and Time to First Byte impact. Rather than fetching every asset on a long-scrolling page at once, the browser focuses on above-the-fold content first, deferring everything else until it becomes relevant. This approach is particularly powerful for image-heavy blogs, ecommerce catalogues, and infinite-scroll feeds where only a small portion of assets are visible at any given time. By adopting lazy loading, you not only save bandwidth but also reduce CPU and memory usage, leading to smoother scrolling and better battery life on mobile devices.
There are two primary ways to implement lazy loading today: native browser attributes and JavaScript-based solutions built on the Intersection Observer API. Native lazy loading is simpler and requires minimal code changes, making it ideal for most use cases. Intersection Observer, on the other hand, provides fine-grained control over exactly when assets begin loading and can power advanced interactions such as animations, progressive placeholders, and analytics triggers. Understanding both approaches allows you to choose the right strategy—or combination of strategies—for your specific performance goals and tech stack.
Native lazy loading attribute: loading= »lazy » implementation standards
Native lazy loading is the most straightforward technique available, requiring only an additional attribute on your <img> and <iframe> elements. By adding loading="lazy", you instruct the browser to defer loading that resource until it is near the viewport, following implementation heuristics defined by each browser vendor. This small markup change can lead to substantial performance gains, especially on pages with dozens of below-the-fold images. In many cases, you can roll out native lazy loading across your entire site with a simple template or CMS update.
However, native implementations are not identical across all browsers, and there is currently no universal guarantee on the exact distance from the viewport at which images begin loading. Some browsers may start fetching lazy images earlier to avoid visible pop-in, while others may be more aggressive in deferring requests to preserve bandwidth. To avoid degrading the user experience, you should avoid using loading="lazy" on critical, above-the-fold images such as hero banners, logos, and key product shots. A good rule of thumb is to lazy load only those assets that start outside the initial viewport, allowing the browser to prioritise the most important content first.
Intersection observer API: custom lazy loading with threshold configuration
The Intersection Observer API offers a powerful and flexible foundation for building custom lazy loading solutions when native attributes are insufficient. It allows you to register callbacks that fire when an element enters or exits the viewport—or a specified root container—based on configurable thresholds. In practice, you attach a placeholder element or low-resolution preview to the DOM, then swap in the full-resolution image once the observer reports sufficient visibility. This pattern gives you precise control over when network requests are triggered, which is invaluable for fine-tuning the balance between perceived performance and bandwidth usage.
For example, you might configure an observer with a rootMargin of 200px so that images begin loading slightly before they scroll into view, reducing the risk of visible loading delays. The threshold option lets you determine how much of the element must intersect with the viewport before the callback fires, which can be helpful for larger banners or horizontally scrolling carousels. While an Intersection Observer-based approach involves more JavaScript than native loading="lazy", it also opens the door to advanced performance patterns like preloading near-future content and logging viewability metrics for optimisation. If you are serious about squeezing every last millisecond out of your media loading strategy, mastering Intersection Observer is well worth the investment.
Lazysizes JavaScript library: advanced placeholder and blur-up effects
LazySizes is a mature, battle-tested JavaScript library that builds on the principles of Intersection Observer while providing a higher-level API and many performance-oriented plugins. It supports responsive images with srcset and sizes, automatic lazy loading of background images, and flexible configuration through data attributes. One of its most attractive features is the ability to implement advanced placeholder strategies, such as low-quality image placeholders (LQIP) and blur-up effects. With these techniques, users see a tiny, highly compressed preview almost instantly, which then smoothly transitions into the full-resolution image as it finishes loading.
This visual refinement can dramatically improve perceived performance on slower connections, making the experience feel more polished and intentional. LazySizes also helps avoid common pitfalls such as layout shifts by encouraging you to set explicit width and height—or aspect-ratio boxes—for your images. Have you ever scrolled a page where content jumps around as images load? That is exactly the sort of disruption LazySizes can help mitigate when configured correctly. While the library adds some JavaScript overhead, the trade-off often pays off on media-heavy sites where user perception and smooth interactions are paramount.
Above-the-fold content strategy: critical image prioritisation
Optimising images and media for faster loading times is not only about deferring non-critical assets; it is also about prioritising the ones that matter most. Above-the-fold images—those visible within the initial viewport—have an outsized impact on perceived performance and user engagement. These might include hero banners, product hero shots, key editorial visuals, and brand logos. Ensuring that these assets load quickly, sharply, and without layout shifts should be a top priority when shaping your performance strategy.
One effective approach is to avoid lazy loading for above-the-fold images and instead mark them for early loading using techniques like <link rel="preload"> or critical CSS background images. You can also serve these images from highly optimised formats such as AVIF or WebP with appropriate fallbacks, and ensure they are delivered via a fast CDN close to the user. Maintaining explicit dimensions or aspect ratios prevents cumulative layout shift (CLS), which is a key Core Web Vitals metric monitored by search engines. By combining smart prioritisation with lazy loading for everything else, you create a balanced experience where the most important content appears instantly while the rest loads quietly in the background.
Content delivery networks for media assets: cloudflare, fastly, and AWS CloudFront
Content Delivery Networks (CDNs) are essential for delivering images and media assets with low latency to users scattered across the globe. Instead of every request travelling back to a single origin server, a CDN caches your static files—images, videos, CSS, and JavaScript—on edge servers located in many geographic regions. When a user requests an asset, it is served from the nearest edge node, reducing round-trip time and improving overall page responsiveness. In an era where even a 100ms delay can affect conversion rates, distributing media via a CDN is one of the most cost-effective ways to accelerate your site.
Providers like Cloudflare, Fastly, and AWS CloudFront offer robust feature sets tailored to different needs and budgets. Cloudflare is known for its combination of CDN, security features, and DNS services, making it an attractive all-in-one solution for many sites. Fastly focuses on high configurability and real-time control, which appeals to engineering teams managing complex media workflows and personalised content at scale. AWS CloudFront integrates tightly with other AWS services such as S3 and MediaConvert, enabling end-to-end pipelines for storing, transforming, and delivering large media libraries. When choosing a CDN, consider factors such as global edge coverage, image and video optimisation capabilities, pricing models, and ease of integration with your current stack.
Image compression tools and workflows: TinyPNG, squoosh, and ImageOptim
Even with the right formats and delivery mechanisms, achieving optimal performance requires effective compression of your media assets. Image compression tools like TinyPNG, Squoosh, and ImageOptim allow you to reduce file sizes while maintaining acceptable visual quality, often with surprisingly little visible difference. TinyPNG and its sibling TinyJPG use smart lossy compression techniques to strip unnecessary data and reduce colour palettes, making them especially effective for PNG icons and JPEG photographs. Squoosh, a browser-based tool by Google, offers an interactive interface where you can compare different codecs, quality levels, and advanced settings side by side.
ImageOptim is popular among macOS users because it integrates seamlessly into local workflows, enabling drag-and-drop optimisation for batches of files. It can strip metadata, apply lossless compression, and even hook into command-line tools for automation. For teams looking to standardise image optimisation, a common pattern is to incorporate these tools into a build pipeline using task runners or CI/CD scripts. For example, you might automatically compress all new image assets before they are deployed, ensuring a consistent level of optimisation without requiring designers or content editors to manage it manually. By making image compression a non-negotiable step in your publishing process, you steadily reduce page weight and improve load times across your entire site.
Video optimisation strategies: adaptive bitrate streaming and codec selection
Video content can add significant engagement and storytelling power to your site, but it also poses some of the toughest performance challenges. A single unoptimised background video can outweigh all other assets combined, overwhelming slower connections and older devices. To optimise video for faster loading times, you need to consider both how the file is encoded and how it is delivered. Adaptive bitrate streaming, efficient codecs, and smart preload strategies all work together to ensure that users see smooth playback with minimal buffering, regardless of their network conditions.
Unlike simple progressive downloads, modern streaming protocols adjust the quality of the video in real-time based on available bandwidth and CPU capacity. This dynamic behaviour helps prevent the familiar experience of a video starting crisply only to stutter and buffer as network conditions fluctuate. At the same time, you must choose codecs that strike the right balance between compression efficiency and playback compatibility across browsers and devices. Let us examine some of the most important codec choices and streaming protocols so you can make informed decisions for your own media strategy.
H.264 versus H.265 (HEVC) codec efficiency comparison
H.264 (AVC) has been the de facto standard for web video for over a decade, offering broad compatibility across browsers, mobile devices, and streaming platforms. It delivers decent compression efficiency and is supported natively by most hardware decoders, which helps keep CPU usage and battery consumption in check. H.265 (HEVC) was designed as its successor, promising roughly 40–50% better compression efficiency at the same perceived quality. In practical terms, that can mean a 4Mbps H.264 stream replaced by a 2–2.5Mbps HEVC stream without noticeable quality loss, which is a significant bandwidth saving at scale.
However, HEVC adoption on the open web has been hampered by patent licensing complexities and uneven browser support. While it is widely supported on many smart TVs and Apple devices, some desktop browsers and Android environments lack robust native support. This mismatch creates challenges when you are trying to deliver a single, universal experience. A common strategy is to use H.264 as a baseline for broad compatibility while exploring HEVC for specific platforms or apps where you control the playback environment. When in doubt, test your audience’s device mix and weigh the operational complexity against the potential bandwidth and quality benefits.
VP9 and AV1 codecs: open-source alternatives for web streaming
VP9 and AV1 emerged as royalty-free alternatives to the H.26x family, driven by major industry players seeking more predictable licensing and better compression efficiency for large-scale streaming. VP9, developed by Google, offers roughly 30–40% better compression than H.264 and enjoys strong support in modern browsers like Chrome and Firefox, as well as in many smart TVs and Android devices. It is widely used by platforms like YouTube for high-resolution streams, particularly at 4K and above, where its efficiency benefits become more pronounced. For web developers, VP9 can be an excellent choice when paired with H.264 fallbacks for older devices.
AV1, backed by the Alliance for Open Media, pushes compression efficiency even further, often outperforming both VP9 and HEVC at the cost of higher encoding complexity. Early deployments by Netflix and YouTube have demonstrated promising real-world gains, especially on constrained networks and mobile devices. Browser support for AV1 has been growing steadily, with most major browsers now offering at least partial decoding capabilities. Encoding remains computationally expensive, though newer encoders and hardware acceleration are improving the situation. If you manage a large video catalogue and are committed to long-term optimisation, AV1 is worth evaluating as part of a multi-codec strategy that balances cutting-edge efficiency with today’s playback realities.
HTTP live streaming (HLS) and MPEG-DASH protocols
HTTP Live Streaming (HLS) and MPEG-DASH are the dominant adaptive bitrate streaming protocols used to deliver high-quality video over standard HTTP infrastructure. HLS, originally developed by Apple, segments video files into small chunks and provides a manifest file that describes available quality levels and segment locations. The player monitors network conditions and switches between these levels dynamically, ensuring continuous playback with minimal buffering. Because HLS is deeply integrated into Apple’s ecosystem and widely supported by commercial players, it has become a default choice for many streaming workflows.
MPEG-DASH (Dynamic Adaptive Streaming over HTTP) is an open standard that offers similar capabilities, often with greater flexibility in codec support and configuration. Many enterprise-grade players and platforms support both HLS and DASH, allowing you to serve different manifests depending on the client environment. Both protocols work well with CDNs, which cache individual segments and deliver them efficiently to users worldwide. When you are optimising images and media for faster loading times, adopting HLS or DASH for video ensures that users receive the best possible quality their connection can handle, without overloading your servers or their devices.
Video poster images and preload attributes for performance
Even before a user hits play, videos can impact perceived performance and layout stability. The poster attribute on the <video> element allows you to specify a static image that displays before playback begins, giving users a meaningful visual cue without loading the entire video. By optimising this poster image—using modern formats, responsive sizing, and proper compression—you provide context while keeping initial page weight low. This is especially valuable for hero videos and product demos where the visual teaser can influence engagement and click-through rates.
The preload attribute controls how much of the video the browser fetches before the user interacts with it, with common values including none, metadata, and auto. Setting preload="none" avoids unnecessary data usage on pages with multiple videos, while metadata allows the browser to retrieve basic information like duration without downloading full content. Overusing preload="auto" can lead to heavy background data transfers that slow other critical resources, so it should be reserved for cases where immediate playback is crucial. By combining well-chosen poster images with thoughtful preload settings, you ensure that video elements enhance your site’s storytelling without undermining its speed and responsiveness.